Branches
Expanding organizations often establish multiple branches to reach a wider customer base. our accounting software offers a seamless solution by allowing businesses to create branches and effortlessly monitor transactions associated with each branch.
This feature provides valuable insights into branch performance, enables centralized management, ensures consistent bookkeeping practices, and facilitates reporting on each branch, empowering businesses to make informed decisions and drive success in a multi-branch environment.
Enable Multiple Branches
To use and get started with multiple branches feature you should enable it first.
- From Preferences > Branches.

Once you activate the Branches feature, it becomes a permanent of your accounting setup and cannot be disabled. However, if you no longer need a particular branch, you have the flexibility to either delete it or mark it as inactive.
Create Branches
After enabling Branches feature on your organization now we should create branches, the system automatically will create initial branch as a primary/head branch
- From Preferences > Branches.
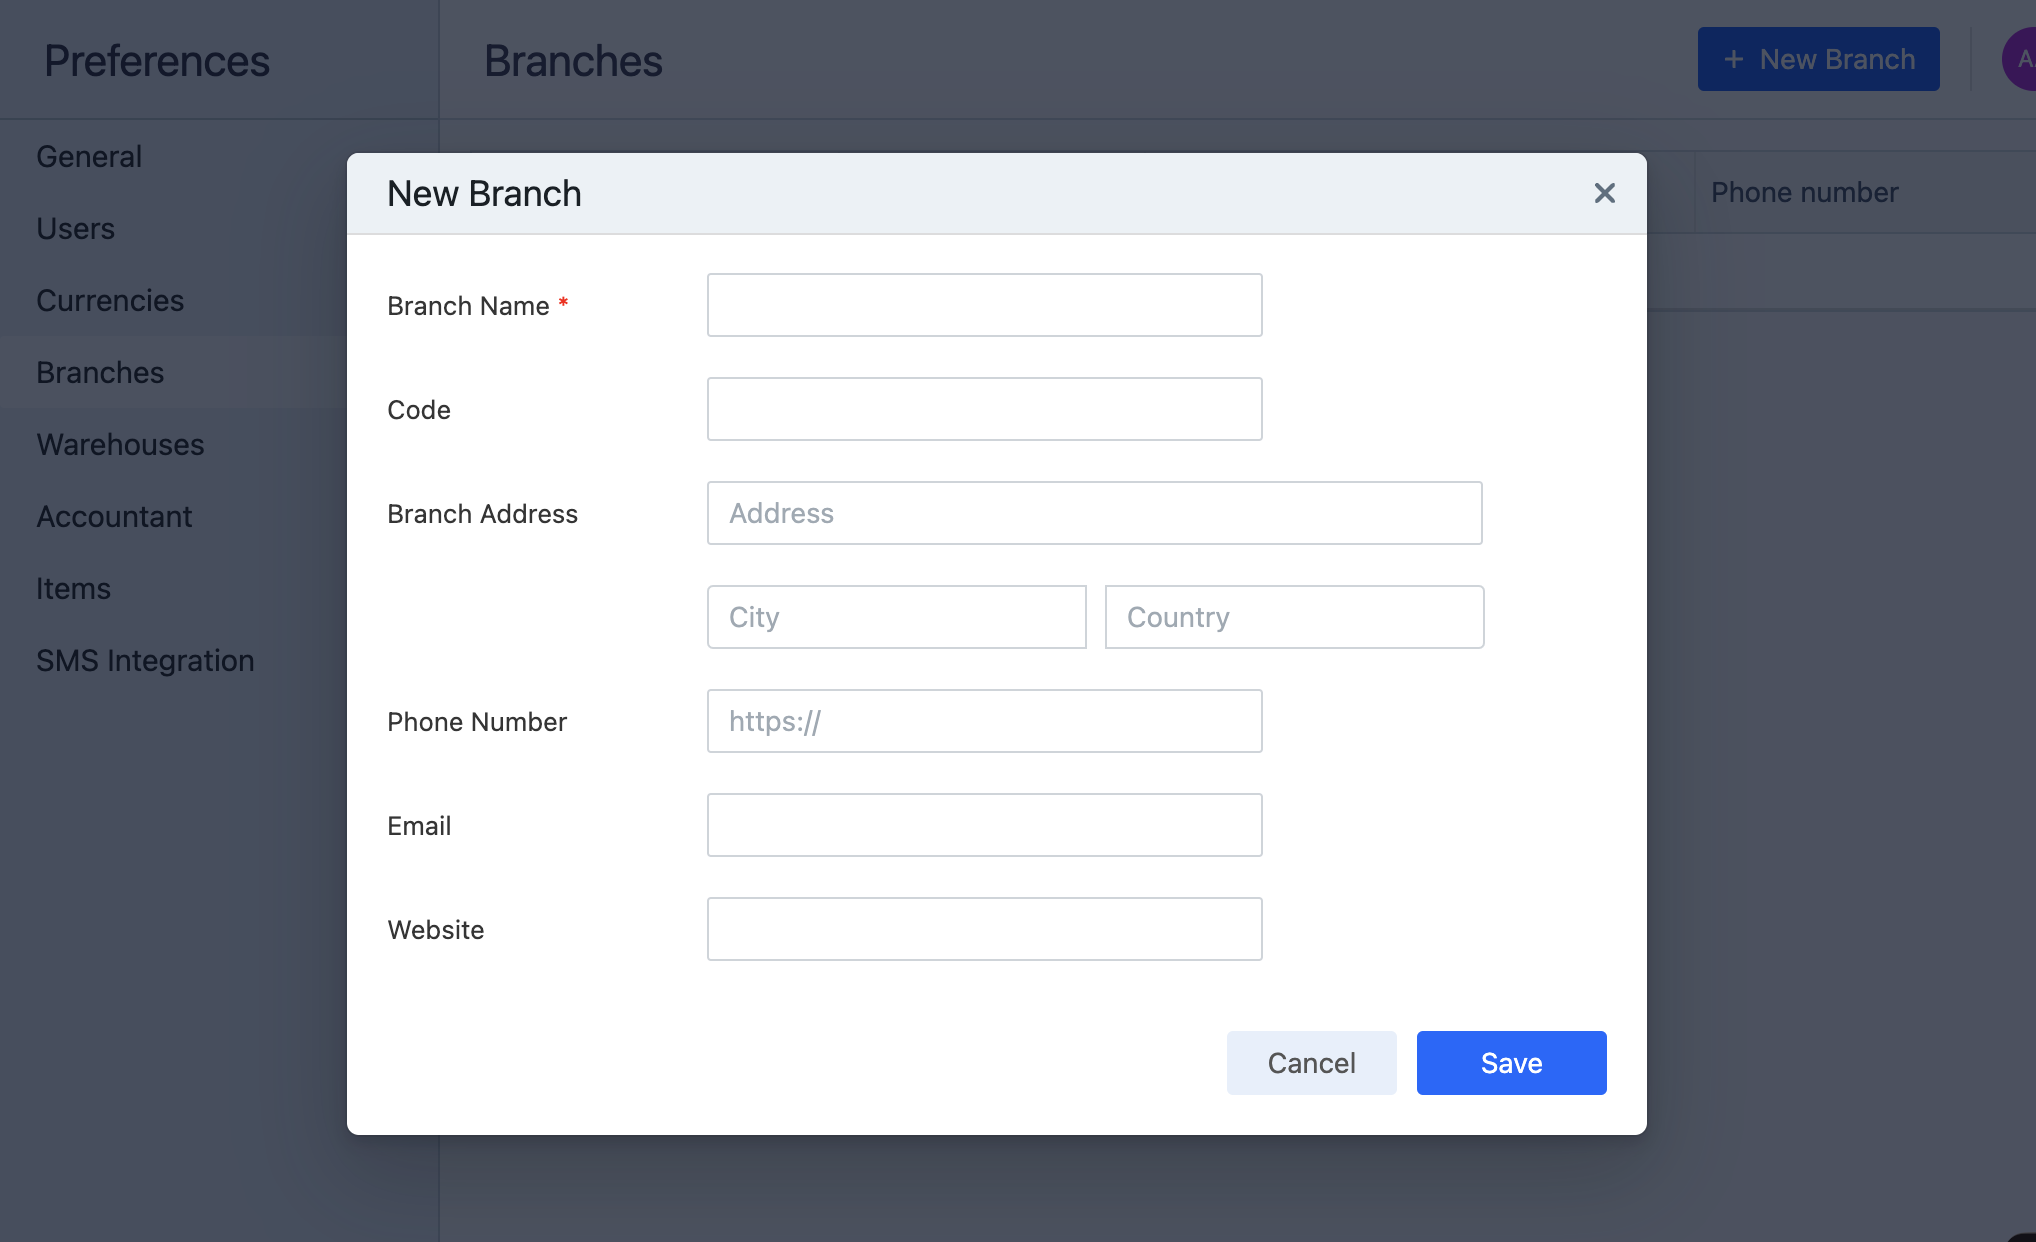
- Click on the New Branch button and the pop up will show up.

- Enter the Branch Name and Address.

- Click on Save to submit the changes.
Assign Transactions to Branches
Once you've enabled the multiple branches feature all the next transactions should assign to an particular branch whether if you picked a branch or the default branch will be assgined.
When you create a new transactions like sale invoices, banking transactions, bills, etc. you have ability to assgin any transaction with the relevant branch.
Let's take an example to associate a sale invoice to a branch.
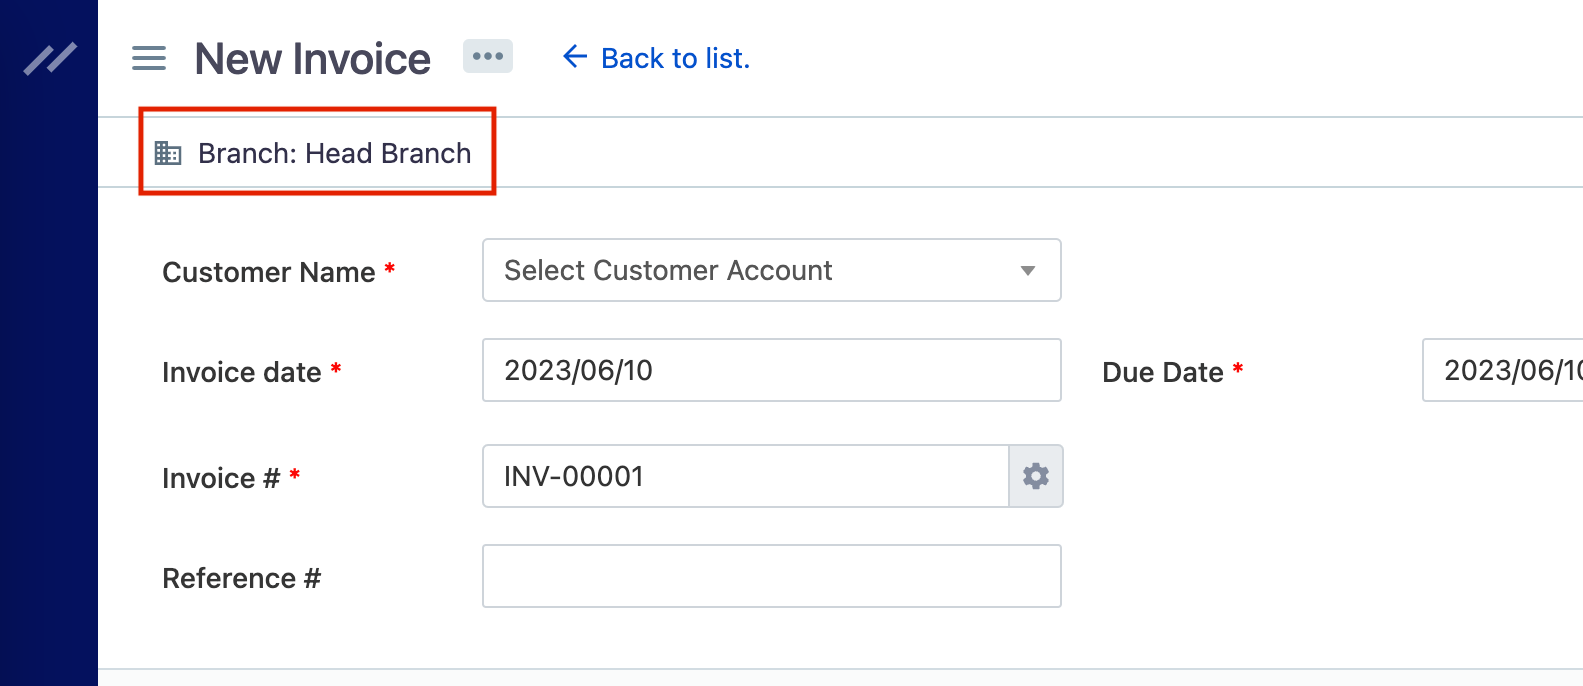
- From New Invoice, you might noticed the Branch select has been showed up after enabling Branches feature.

- Select a branch for that invoice.
All the transactions added before enabling the feature will be associated to the head office/primary branch.
Similarly, you will be able to create transactions and associate branches for other type of transations as well.
Reports Filter for Specific Branch
After we assgined transactions to their branches now we have ability to filter out the transactions on get financial statement for each branch.
- Go to the Reports section in Bigcapital.
- Select a report for which you want to view the details. For example, the Balance Sheet report.
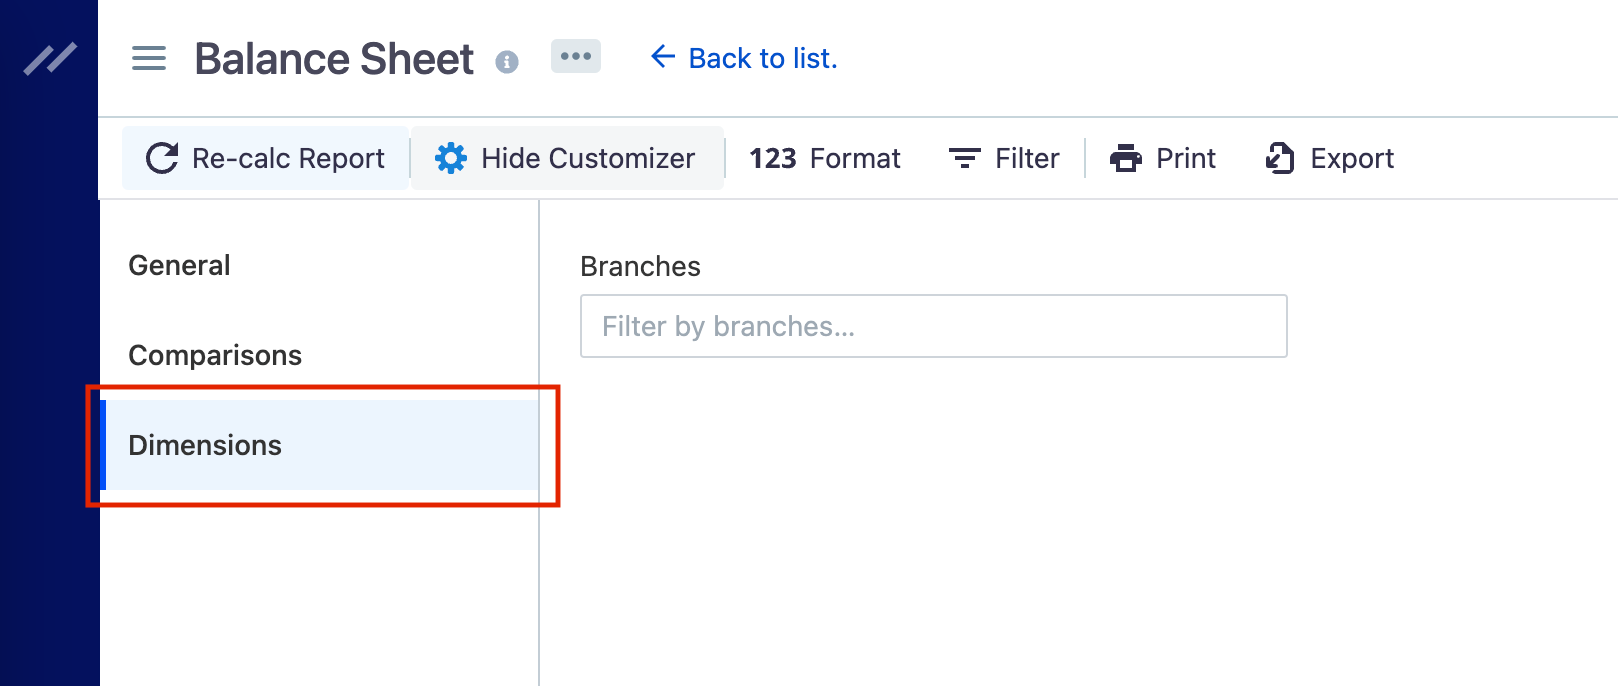
- Click the Customize Report button in the top bar.
- Go to the Dimensions tab and you will be able to find Branches filter.

- Select branches you want to filter out from the dropdown.
- Click on Re-calc Report report.